Setting up DNS records for authentication is critical for improved delivery. This page goes over setting up the needed DNS records when using HostMonster or BlueHost.
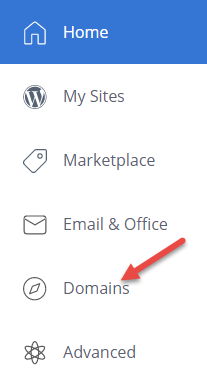
After you login, click Domains.
Select Manage for the domain you wish to make changes to.

You will then add 3 TXT records and one CNAME record.
SPF
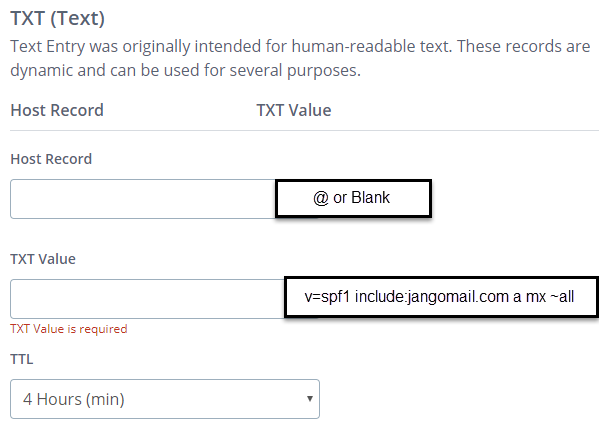
An SPF record is inserted as a TXT record.
- For Host Record, insert: @ or blank
(This will apply the SPF record to the primary domain. If you are creating a record for a subdomain, please see below.) - For TXT Value, insert: v=spf1 include:jangomail.com a mx ~all
- Click Save.
If you already have an SPF record...
Then you simply need to input “include:jangomail.com”. It's important to make sure that your SPF record, if you already have one, does not have too many lookups. If you do have too many lookups, you can consider removing any unnecessary inclusions or consider using a subdomain for sending email.
DKIM
The value for your DKIM record must first be created in your JangoMail account. If you have not yet created it, please see this page for instructions.
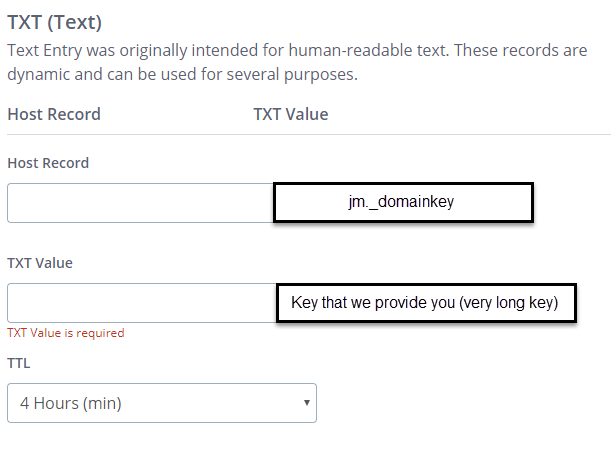
A DKIM record is also inserted as a TXT record.
- For Host Record, insert: jm._domainkey
(If you have a custom selector, instead of "jm", then use "yourcustomselector._domainkey".) - For TXT Value, insert the custom value created in your JangoMail account.
- Click Save.
To enable your DKIM record, return to your JangoMail account where you created the key (in Settings, under Sending and Receiving) and click on the icon with the lightning bolt next to this domain and selector. You will see a message indicating success or an error. It may be that the record has not fully propogated yet or there is an error in what was entered. Give it time and check back later. If you have waited 24 hours and still are unable to enable your DKIM, double-check your value is correct and submit a support ticket for assistance.
DMARC
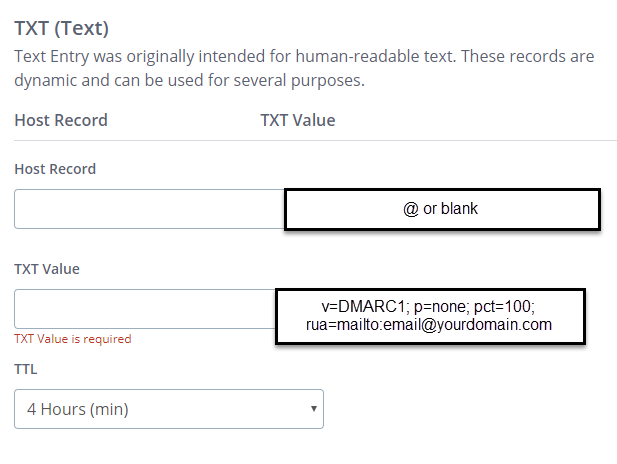
The DMARC record is a TXT record.
- For Host Record, insert: @ or blank
- For TXT Value insert: v=DMARC1; p=none; pct=100; rua=mailto:email@yourdomain.com
- Click Save.
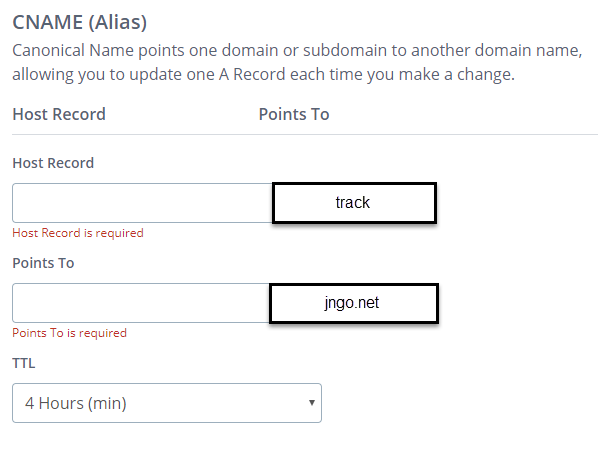
Custom Tracking Domain
The Custom Tracking Domain is a CNAME record.
- For Host Record, insert: track
- For Points To, insert: jngo.net
- Click Save.
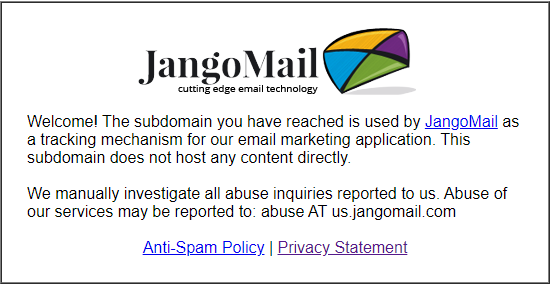
After this has been created, enter track.yourdomainname.com into a new tab in your browser. If you receive the JangoMail message screen as shown below, your tracking domain has been successfully created!
Return to your JangoMail account, and go to Settings. Expand Tracking and select Tracking Domain. Insert track.yourdomainname.com and Save.
Comments
0 comments
Article is closed for comments.